If you love the rich, flaky texture of fresh salmon, learning how to pressure can it at home is a game-changer. Canning salmon is a great way to preserve a seasonal catch or take advantage of a bulk purchase while locking in its fresh flavor and nutrients for months to come. Unlike freezing, pressure canning ensures your salmon is shelf-stable, ready for quick meals, and safe to store without electricity.
In this guide, I’ll walk you through everything you need to know about pressure canning salmon, from choosing the best fish to following USDA-approved methods for safe preservation. Whether you’re a seasoned canner or new to home food preservation, you’ll find step-by-step instructions, troubleshooting tips, and the best ways to enjoy your home-canned salmon.

Pressure Canning Salmon
Due to the low acidity of fish, salmon must be pressure canned to be safe, just like all canned meats. Also you cannot pressure can in an electric pressure cooker – you need a pressure canner. Do not attempt to can this recipe using a water bath or steam canner, it is not safe.
Fish can be safely canned in pint or half pint jars. Half pints are safe, but the fish consistency will not be as good as it is when you use pint jars.
There are instructions for safely canning fish in quart jars at home.…however, the process is more complicated and the processing time is VERY long. Because of this, canning fish in quarts is not something that is practical or widely recommended.
Prepare the salmon
With all fish, the head, tail, scales, and fins must be removed prior to canning. I personally prefer to remove the skin all together prior to canning. Fish should be gutted within 2 hours of being caught and kept on ice until you are ready to process them.
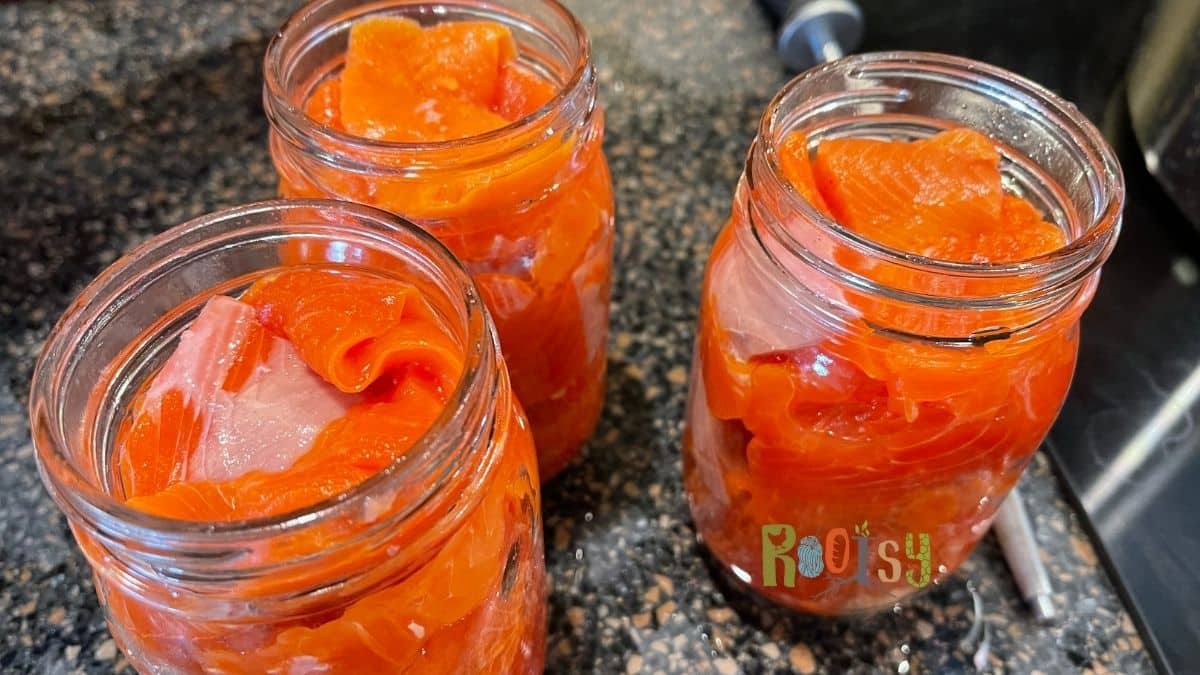
Cut the fish into 3.5 inch lengths or smaller. I usually cut it into 1 inch strips or so, sometimes smaller. This just makes for easier handling down the line. Smaller pieces can be stuffed in to fill jars as well.
Prepare canning equipment
Wash the pressure canner and add water, according to the manufacturer’s instructions. Put the rack inside the canner and put the canner on the stove. Heat the canner over medium heat – do not let the water boil.
Wash the jars and lids in hot soapy water and check the jars for nicks and cracks.
Fill the jars
Fill the pint jars with salmon pieces, leaving a 1-inch headspace. If you choose to leave the skin on, place the skin side against the glass. Pack the fish in fairly tight. You can add up to 1 teaspoon of salt to each pint jar, if you desire. I rarely add salt, choosing instead to season the final product.
Do not add any liquid. The fish fat will produce its own liquid.
Clean rims with a clean, damp cloth.
Place lids on the jars and screw bands on fingertip tight – like you would put on a mayonnaise jar lid.
Process jars
Process the filled jars for 100 minutes for pint jars and half-pint jars at 10 lbs. pressure for a weighted gauge canner and 11 lbs. pressure for a dial gauge pressure canner, adjusting pressure for altitude if necessary (see below). Timing starts after the pressure canner has reached pressure.
After processing time is completed, turn off the heat and let the pressure can depressurize naturally.
Once canner is depressurized, remove the weight or vent cover and let the canner rest for 10 minutes.
Open canner with lid facing away from you and using jar lifters, remove jars.
Put the hot jars on a towel on the counter and let cool for 12-24 hours.
Storing canned salmon
When the jars have completely cooled (12-24 hours), remove bands and check for good seals. When you press on the lid there should be no give to the lid. Also, when you gently pick up the jar by the lid, the lids should remain on the jar. If any jars failed to seal, put them in the refrigerator and use within 5 days.
Wipe jars with a clean cloth, label jars and store in a cool, dark place. Home canned fish is best when used within a year, however, as long as the jar is sealed, the canned fish is perfectly safe to eat.
Altitude Adjustments for Canning Salmon
When pressure canning at altitudes about sea level, the pressure needs to be adjusted to ensure safety. Use the chart below to determine what pressure is needed to can your salmon.
For dial gauge pressure canners:
- 0 to 2,000 feet in elevation – 11 lbs pressure
- 2,001 to 4,000 feet in elevation – 12 lbs pressure
- 4,001 to 6,000 feet in elevation – 13 lbs pressure
- 6,001 to 8,000 feet in elevation – 14 lbs pressure
For weighted gauge pressure canners:
- 0 to 1,000 feet in elevation – 10 lbs pressure
- Above 1,000 feet – 15 lbs pressure

Canning Other Fish
There are several kinds of fish that can be safely canned at home using these instructions. These include mackerel, steelhead, trout, and other kinds of fatty fish, except tuna. Tuna can be safely canned at home but the process is a little different than this process. If you’re canning tuna, you need to follow the tuna instructions.
Little crystals of magnesium ammonium phosphate can sometimes form on canned salmon. They typically dissolve when heated and is safe to eat. There is no way for home canners to avoid this.
Ways to Use Canned Fish
I grew up eating home canned salmon mixed with cream cheese and herbs for a dip with crackers, pan fried salmon patties, or in a salmon chowder (think clam chowder, but with fish). It would be very tasty in our Potato Leek Soup!
If you want more inspiration be sure to check out our curated collection of recipes featuring canned salmon for frugal and delicious ideas.
Pressure canning fish is a wonderful way to keep healthy protein in the pantry for your family all winter long and it saves room in the freezer!
Pressure Canning Fish
Ingredients
Equipment
Method
- Fish should be gutted within 2 hours of being caught and kept on ice until you are ready to process them. Remove head, tail, fins, and scales. You can remove the skin or leave it on.
- Cut the fish into 3.5 inch lengths or smaller. I usually cut it into 1 inch strips or so, sometimes smaller.
- Wash the pressure canner in warm soapy water and add water, according to the manufacturer's instructions. Put the rack inside the canner and put the canner on the stove. Heat the canner over medium heat to about 140 degrees F – do not let the water boil.
- Wash the jars and lids in hot soapy water and check the jars for nicks and cracks.
- Fill the jars with the salmon pieces, leaving a 1-inch headspace. If you choose to leave the skin on, place the skin against the glass. Pack the fish in fairly tight.
- You can add up to 1 teaspoon of salt to each pint jar, if you desire. I rarely add salt, choosing instead to season the final product.
- Do not add any liquid. The fish fat will produce its own liquid.
- Clean jar rim with a clean, damp cloth.
- Place lids on the jars and screw bands on fingertip tight – like you would put on a mayonnaise jar lid.
- Put the filled jars in the pressure canner and lock the canner lid into place.
- Heat the canner on medium high until you see steam coming out of the vent.
- Let the canner vent a steady stream of steam for 10 minutes before putting on the weight or closing the petcock.
- Process the filled jars for 100 minutes for pint jars and half-pint jars at 10 lbs. pressure for a weighted gauge canner and 11 lbs. pressure for a dial gauge pressure canner, adjusting pressure for altitude if necessary (see below). Timing starts after the pressure canner has reached pressure.
- After processing time is completed, turn off the heat and let the pressure can depressurize naturally.
- When the pressure guage is at zero, remove the weight or open the petcock and let the canner rest for 10 minutes.
- Open canner with lid facing away from you and using jar lifters, remove jars.
- Put the hot jars on a towel on the counter and let cool for 12-24 hours.
- When the jars have completely cooled (12-24 hours), remove bands and check for good seals. If any jars failed to seal, put them in the refrigerator and use within 5 days.
- Wipe jars with a clean cloth, label jars and store in a cool, dark place. Home canned fish is best when used within a year, however, as long as the jar is sealed, the canned fish is perfectly safe to eat.
Notes
- 0 to 2,000 feet in elevation – 11 lbs pressure
- 2,001 to 4,000 feet in elevation – 12 lbs pressure
- 4,001 to 6,000 feet in elevation – 13 lbs pressure
- 6,001 to 8,000 feet in elevation – 14 lbs pressure
- 0 to 1,000 feet in elevation – 10 lbs pressure
- Above 1,000 feet – 15 lbs pressure
Tried this recipe?
Let us know how it was!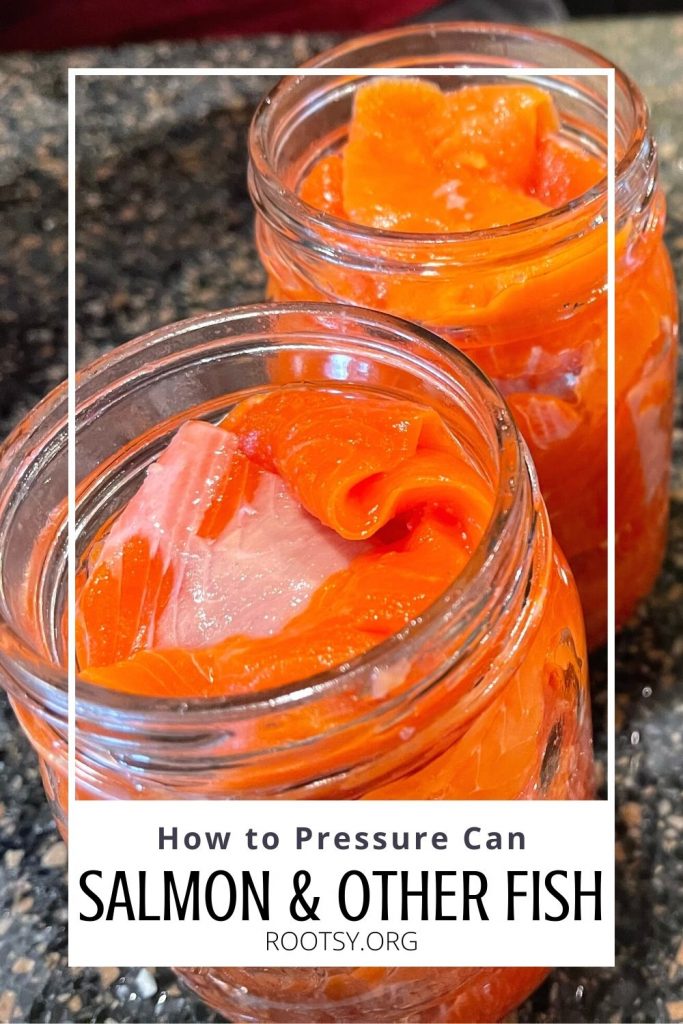
Thanks for doing a simple and to the point blog on this! However, I highly disagree with your statement: “There are instructions for safely canning fish in quart jars at home.…however, the process is more complicated and the processing time is very long. Because of this, canning fish in quarts is not something that is practical or widely recommended”.
My husband’s family has canned salmon for about 20 years now (he and I now continue to do it), and they have always done quarts, 110 minutes, at 10 lb pressure (many people do recommend to use 15 lb pressure tho). It is hardly any extra trouble at all to can. For larger families, quarts is far more practical than going thru multiple pints for a meal. So for others out there, quarts are perfectly fine, and don’t really take that much longer than the 100 minutes recommended here for pints.
Hi Amanda, the USDA recommends that fish packed in quart jars be processed for 160 minutes at 10psi (15psi at altitudes above 1,000 feet). They also have specific recommendations for properly venting the canner when canning fish in quarts (these are different than the how you would normally vent a canner). You can read more in their publication on canning fish in quart jars.
Is it safe to use fish that not get the full 100 minutes at 10 pounds pressure Only got 87 minutes?
Unfortunately, it’s not safe. They need to be processed for the entire time to ensure safety.