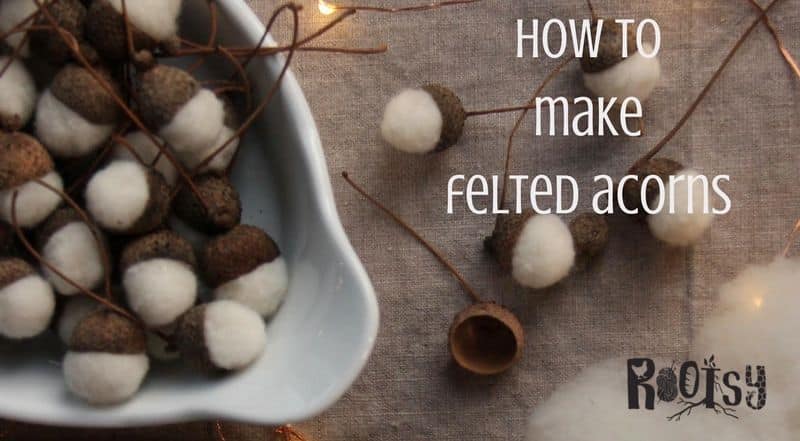
Making felted acorns is a great way to bring nature indoors and use natural elements in your fall decorating. Learn how to make felted acorns in this step by step guide.
Learning to Needle Felt
Fall is such a great time to use nature in your crafts. These felted acorns are an easy and frugal fall craft for the whole family.
Felt acorns are created using the craft of needle-felting. Needle felting is essentially just the process of poking loose wool with a special needle until it mats together. Before the felting process begins, the loose wool looks a bit like a large cotton ball. When poked with a needle, the wool fibers connect and tighten to form whatever shape you like.
Making felted acorns is an easy project for a felting beginner because the acorns are tiny spheres (no tricky shapes required!). These little acorns can then be used on their own as small decorations or can be combined together into a seasonal decor piece such as a Christmas garland. The acorns (and decor items made from them) make very sweet handmade gifts.

The needle-felting process does involve handling a specialized felting needle. If you’re worried about using a sharp needle, it is possible to make these acorns without needle-felting by using a wet-felting process instead.
Wet-felting is preferable if you’re making this craft with children or just don’t want to use a needle for safety reasons. Wet-felting the acorns takes longer than needle-felting but is definitely the right choice if there are any hazards posed by needle-felting in your individual situation. Instructions for substituting the wet-felting portion of this craft can be found at The Hermit and Co.
[mailerlite_form form_id=12]How to Use Felted Acorns for Decor
Felted acorns can be placed by themselves or in arrangements, either to use in your own decor or to give as a gift. Place a few felted acorns in a bowl or terrarium, add a string to create a tree ornament, or hang multiple acorns on a string to create a garland.
If you plan to hang the acorns from a garland or as ornaments, simply hang the acorn from its stem or hang it from a twine loop.
If you plan to hang the acorns from a garland or as ornaments, simply hang the acorn from its stem or hang it from a twine loop.
If you choose the twine loop, it’s easiest to drill a hole in the acorn cap prior to gluing in the wool acorn. Drilling a hole in the cap will allow a stronger connection than just gluing the twine onto the top of the cap.
To add a twine loop, first remove the natural acorn stem from the cap. Then use a drill press to drill a small hole in the top of the cap (ensure the cap is properly secured during the drilling process). Follow all instructions for your drill press, including safety guidelines.
After the hole is drilled, thread both ends of a small piece of twine through the top of the cap. Tie a knot inside the cap. The knot should keep the twine loop from pulling through the top of the cap. Once the knot is tied, glue the woolen acorn into the cap to conceal the twine knot.

Materials
Equipment
Method
- Separate the acorn caps from the acorns. Take note of the general size of the acorns, as you’ll be imitating that size with the felted wool. Although some acorns are almost cylindrical, it’s easiest just to make round wool balls rather than trying to get too fancy copying the exact shape of the acorn.

- Separate a small piece of wool from the loose wool roving. After felting, you’ll want the finished wool ball to fit into the acorn cap. Roll and compress the wool in your fingers and compare against the size of your acorn caps. You can always add more wool to the outside of the acorn later on if it turns out too small.
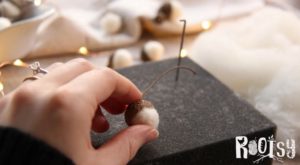
- You’re now ready to begin needle felting. Place the wool onto the felting pad. Use the needle to slowly and carefully poke at the wool. Take note of where your fingers are and make sure you don’t accidentally pierce your fingers with the needle.
- As you poke the wool with the needle, move the wool around by flipping it over and over to create a round ball of wool. Watch what you’re doing and don’t go too fast!
- As the ball develops, compare the wool acorn to the real acorn cap to check that it fits. Check a few acorn caps, as their size can vary. If the wool ball is too small, wrap the ball with an additional thin layer of wool and continue felting. If it’s too big, try to remove some wool or pull it out and start again.
- Once you’re happy with the wool acorn size, glue the wool acorn into the real acorn cap. Let dry.


Video
Made this project?
Leave a comment below!
Mary Jane is a Canadian blogger who writes about organic gardening, nature-inspired DIY’s, and garden-to-table recipes. She loves testing out new growing techniques in her own urban garden as well as sharing stories with other gardeners. In addition to blogging, Mary Jane runs the Organic Gardening Community Facebook group, where all are welcome to ask gardening questions and share helpful tips and encouragement. Find her work on her personal blog, Home for the Harvest.