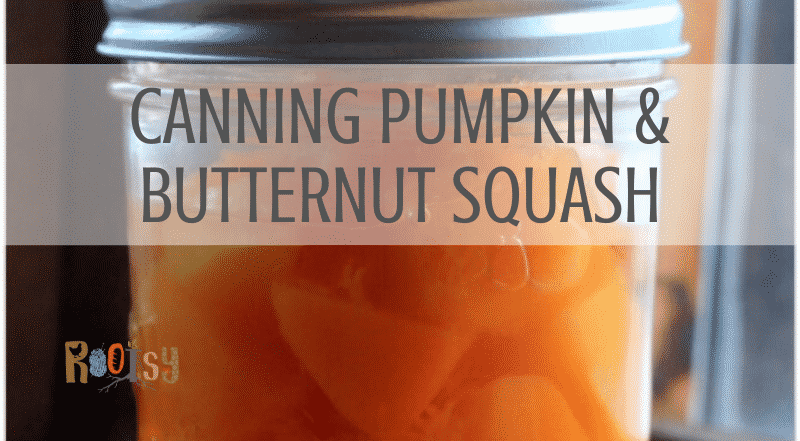
Canning pumpkin is a great way to preserve the harvest. If you have a root cellar, squash will store for up to six months. But for those without a root cellar, canning is a good way to have shelf stable pumpkin all year long. Butternut squash or any winter squash with the exception of spaghetti squash can be preserved in the same manner.
Two DO-NOT-BREAK Rules for Canning Pumpkin
1. Pumpkin (and other squash) is a low acid food and must be pressure canned. According to the National Center for Home Food Preservation and all the other organizations which do home canning research and testing, pressure canning is the ONLY safe method for canning low-acid foods. Water bath canning is only for high acid foods.
2. Canning any winter squash must be done by cutting the squash into 1-inch cubes. Canning pureed pumpkin or pumpkin butter at home is not a safe method of canning pumpkin. With pureed and mashed food there is no way of knowing if proper heat transfer was attained in the center of the jar. If you find an older canning resource, it might have a recipe for home canned pumpkin puree, but after more research was done, it was found to be unsafe.
How to Can Pumpkin
To can pumpkin you’ll need…
- Pressure canner
- Canning jars
- Canning lids and bands
- Pie pumpkins or other winter squash (however, carving pumpkins get stringy when cooked)
- Large pot with water
- Canning tools such as jar lifter, bubble remover tool and headspace tool
- Large knife, vegetable peeler, cutting board
Prepare the pressure canner according to the manufacturers instructions. Put it on the stove over medium-low heat to begin heating up.
Wash the jars in hot, soapy water and put them in the canner to stay warm. They do not need to be sterilized since the processing time is longer than 10 minutes.
Wash the lids and bands and set them aside to use later.
Fill a large stockpot about halfway with warm water and put it on the stove.
Using a large knife and cutting board, cut the pumpkin in half and remove the pumpkin seeds. You can peel the hard rind off the pumpkin with a vegetable peeler or a knife.
Cut the peeled pumpkin into 1-inch cubes.
Place the pumpkin cubes into the large stockpot. Add more water if necessary to cover the pumpkin cubes.
Bring to a boil and boil for two minutes – just long enough to get the squash warm, but not soft.
Drain and reserve the liquid to fill the jars. (You can use a slotted spoon to remove the pumpkin cubes from the water instead of draining the water.)
Place the blanched cubed pumpkin in hot jars, leaving 1-inch headspace. Pour the reserved cooking water over the squash, maintaining the 1-inch headspace.
Remove air bubbles and adjust water level as necessary to maintain the 1-inch headspace.
Wipe the rim of the jar with a clean, damp cloth, put lids on and screw on bands to fingertip tight.
Place jars in the pressure canner and lock the lid in place.
Leaving the vent open, turn on medium-high heat. Once there is a steady steam venting, allow to vent for 10 minutes.
Close vent and bring to 10psi for a weighted gauge canner and 11psi for a dial gauge canner. Be sure to adjust the pressure for your altitude. (Once the correct pounds of pressure is achieved, you can turn down the heat a bit to maintain it.)
Process for 55 minutes for pint jars and 90 minutes for quart jars.
Remove canner from heat and allow canner to return to zero pressure naturally. Wait another ten minutes and then open the lid.
Allow the jars to cool for an additional 10 minutes and then remove from the canner. Place the jars on a kitchen towel to avoid breakage caused by sudden temperature changes.
Do not disturb the jars for 12 to 24 hours – allowing them to cool and seal. If you have any that didn’t seal after 24 hours, refrigerate and use within 7 days.
Remove the bands on the cooled jars, wipe the jars and then label them. Store in a cool, dry place and use within a year to 18 months. As long as the jar is sealed, the contents are safe, however, the quality will deteriorate after 12-18 months.
Tried this recipe? Please leave a ⭐️⭐️⭐️⭐️⭐️ star rating in the recipe card below and/or a review in the comment section further down the page. We always appreciate your feedback. You can also save the recipe for later by pinning it or clicking on the heart in the lower right hand corner.
Canning Pumpkin and Butternut Squash
Ingredients
Equipment
Method
- Prepare the pressure canner according to the manufactures instructions. Put it on the stove over medium-low heat to begin warming up.
- Wash the jars, lids and bands.
- Put the jars in the canner. Set the lids and bands aside to use later.
- Fill a large stockpot about halfway with water and put on the stove.
- Cut the squash in half, remove the seeds and peel. Dice into one inch cubes.
- Put the squash cubes in the stockpot and add more water to cover them.
- Bring to a boil and boil for 2 minutes.
- Remove the hot jars from the canner.
- Using a slotted spoon remove the squash from the stockpot and put them into the warm jars leaving 1-inch headspace.
- Ladle cooking water over squash, maintaining the 1-inch headspace. Remove bubbles and add water as needed.
- Wipe jar rims with a clean, damp cloth. Center the canning lids, and screw bands to fingertip tight.
- Place jars in the pressure canner and lock the lid in place. Leaving the vent open, turn on medium-high heat. Once there is a steady steam venting, allow to vent for 10 minutes.
- Close vent and bring to 10psi if using a weighted gauge canner and 11 psi if using a dial gauge canner, adjusting for altitude. Process for 55 minutes for pint jars and 90 minutes for quarts.
- Remove canner from heat and allow canner to return to zero pressure naturally. Wait another ten minutes and then open the lid. Allow the jars to cool for an additional 10 minutes and then remove from the canner.
- Allow jars to cool and set for 24 hours.
- Remove bands, clean and label jars. Store in a cool, dark place and use within 18 months.
- If any jars didn't seal, store in the refrigerator and use within 7 days.
Notes
Tried this recipe?
Let us know how it was!Using Home-Canned Pumpkin
Make pumpkin puree. Simply start on Step 5 of making pumpkin puree! Once done with the puree, you can make these delicious soft pumpkin cookies or your favorite pumpkin pie filling recipe.
Use the canned pumpkin in any of these pumpkin spice recipes.

More Home Canned Goodness
Pressure canning isn’t just for vegetables, you can also use it to make meals in jars! Before you put the pressure canner away, consider making some ham and bean soup.
Recipe Source
United States Department of Agriculture (USDA). Complete Guide to Home Canning. Agriculture information bulletin No. 539. 2015. Page 4-18.
Curious why you top with boiling water and not use the water they were boiled in?
It’s just a personal preference, you can certainly use the cooking water.
i have some frozen butternut squash, can i thaw and can it, i can’t find a good answer anywhere? thank you in advance
Great question. No, once it’s thawed it will be too soft for safely canning.
Occasionally I can get sweet potatoes/yams at a very good price. After peeling them, could I use the same process for canning them?
Yes, in a section of your canning for this particular recipe on pumpkin butternut squash, and another winter squash it states in the recipe:
With pureed and mashed food there is no way of knowing if proper heat transfer was attained in the center of the jar. If you find an older canning resource, it might have a recipe for home canned pumpkin puree, but after more research was done, it was found to be unsafe.
That after doing this recipe, it was found to be unsafe to do this, so are you still promoting canning this particular item? I’m concerned because I don’t wanna do something that’s knowingly hazardous, especially when I represent another group.
Pumpkin and winter squash must be canned in cubes, not puree, to ensure safety. This recipe is for canning in cubes which is the safe, tested way to pressure can pumpkin and winter squash. We are not promoting pressure canning pumpkin puree – we’re just noting that some older published resources may contain instructions for canning pumpkin puree but those are outdated guidelines and have been proven to be unsafe. I hope that clears up the confusion.