
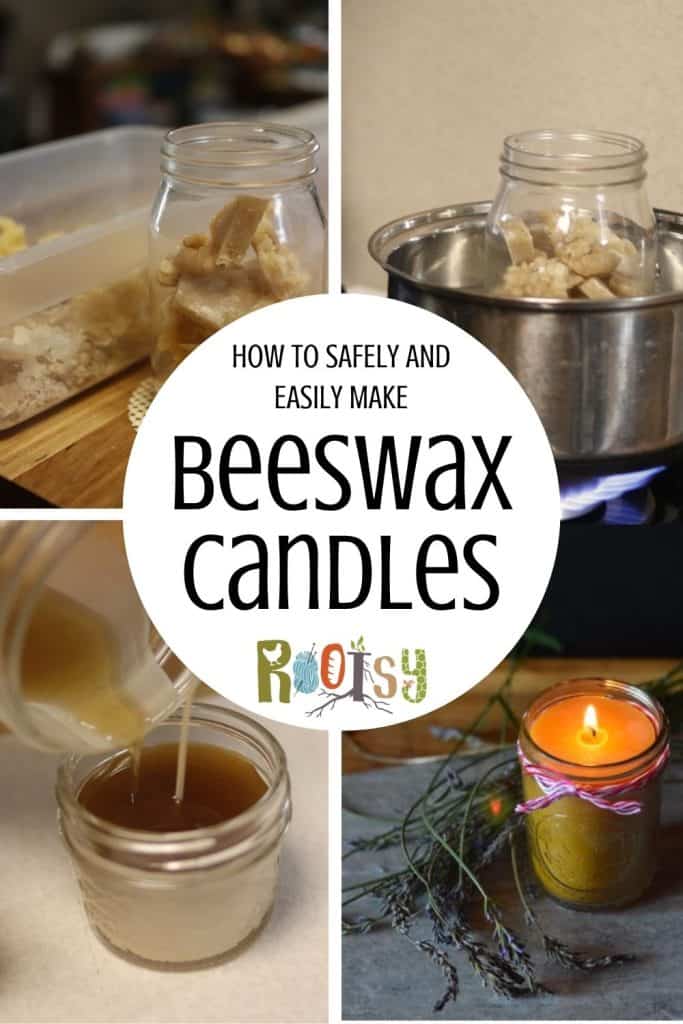
There’s something deeply satisfying about making your own candles from pure beeswax — the soft glow, the light honey scent, and the knowledge that you crafted something natural and clean-burning.
This guide will walk you through the entire process from sourcing the wax, melting tips, choosing the right wick for beeswax, plus safety and troubleshooting tips.

Beeswax jar candles can be used as emergency lighting or to add ambiance to the atmosphere of your home. They make lovely hostess gifts and party favors. Get together with a group of friends and make a bunch as a fall craft that is as useful as they are beautiful.
Why use beeswax for candles?
While beeswax can seem expensive, don’t be tempted to skimp by purchasing cheaper paraffin wax. Beeswax is the only naturally occurring wax. Other cheaper waxes like paraffin wax and soy wax are made through chemical processes. The processing chemicals along with the chemicals used for dying and adding scent will pollute the air.
If you’ve heard that beeswax candles help clear the air by releasing negative ions, you’re not alone. But this might not actually be true. I haven’t found a single scientific source to back up this claim. If you know of one, please share it.
That being said, even if beeswax candles don’t clean indoor air, they also don’t pollute it like other candles will. When you choose to burn a candle, it’s wise to choose the safer option which is a beeswax candle.
Beeswax is a renewable resource and a great way to support your local beekeeper. If you can’t find a local beekeeper to buy beeswax from, Sperry Honey and Beeswax is a good option.
A safe vegetarian alternative to beeswax is Candellila wax, made by sulfuric acid extraction from the wax slipper shrub (Euphorbia cerifera). However candelilla wax lacks many of the healthful qualities that beeswax has. Also, you can’t make your own candelilla wax, it requires laboratory equipment. Instructions on working with candelilla wax are beyond the scope of this post.
Safety Tips for Working with Beeswax:
- Always melt beeswax over indirect heat.
- Never leave melting wax unattended.
- Keep kids and pets away from the workspace.
- Don’t pour leftover beeswax down the drain.
Materials & Tools You’ll Need
The hardest part of making beeswax candles is cleaning up at the end. So, it better to go ahead and designate specific tools for candle making to make clean up easier.
Go to your local thrift store and buy a metal or pyrex bowl for a double boiler. When it’s time to clean up, just let the bowl cool and put it in a ziplock bag for storage. There’s no need to clean it out, it will be ready to go next time you need it.
Materials:
Pure beeswax – Pellets or a grated block will melt faster, but a solid block works to and is less work than trying to grate it.
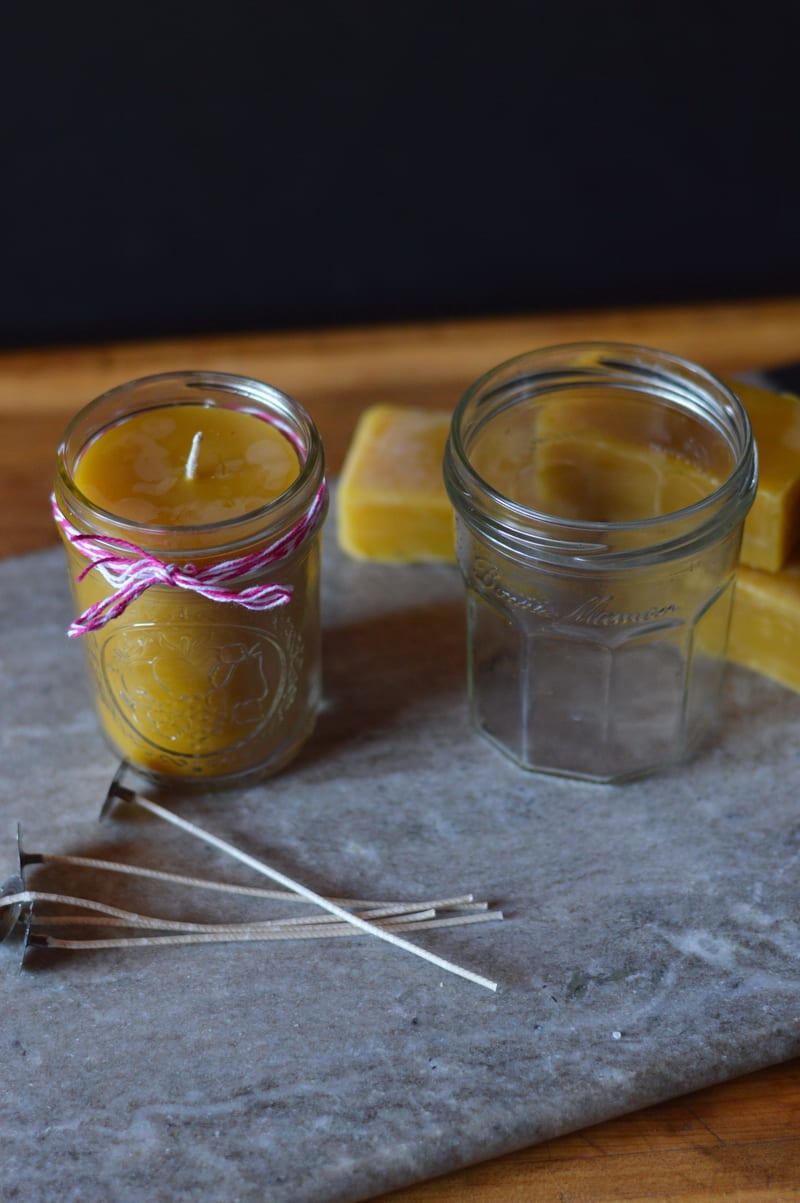
Cotton or hemp wicks – Beewax has a higher melting point than other waxes so the wick is important. Use a medium or large wick for mason jars.
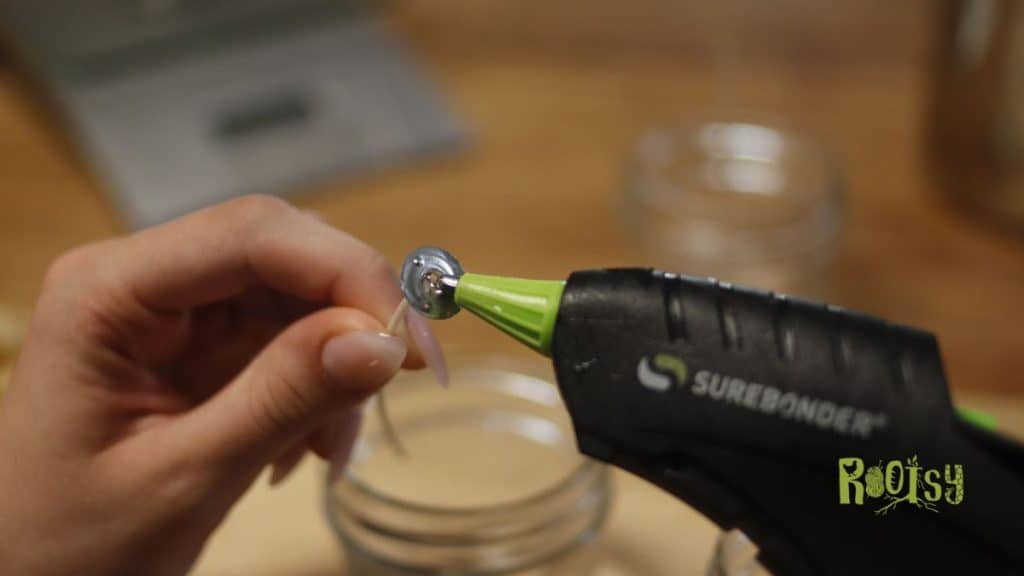
Wick stickers or hot glue – Without something to hold the wick to the jar, it will tend to float. I use hot glue since I have a glue gun and the glue is super cheap. But they also sell wick stickers you can use.
Mason jars or heat-safe containers – It’s really important to use heat safe jars or containers. Candle can get really hot and you want a tempered glass or metal container to avoid breakage.
Tools:
Double boiler – A makeshift version with a pot and heatproof bowl will work just fine. You can also use a mason jar and a silicone pad to keep it off the bottom of the pan. You can also use a layer of canning jar rings to cover the bottom of the pan. Just be sure to melt it gently. Never melt wax in a pot placed directly on a heat source. Wax is highly flammable and a double boiler should always be used.
Stirring spoon – You’ll want a long handled spoon for this, an ice tea spoon is perfect.
Scissors – These don’t need to be fancy but you need something to cut the wick.
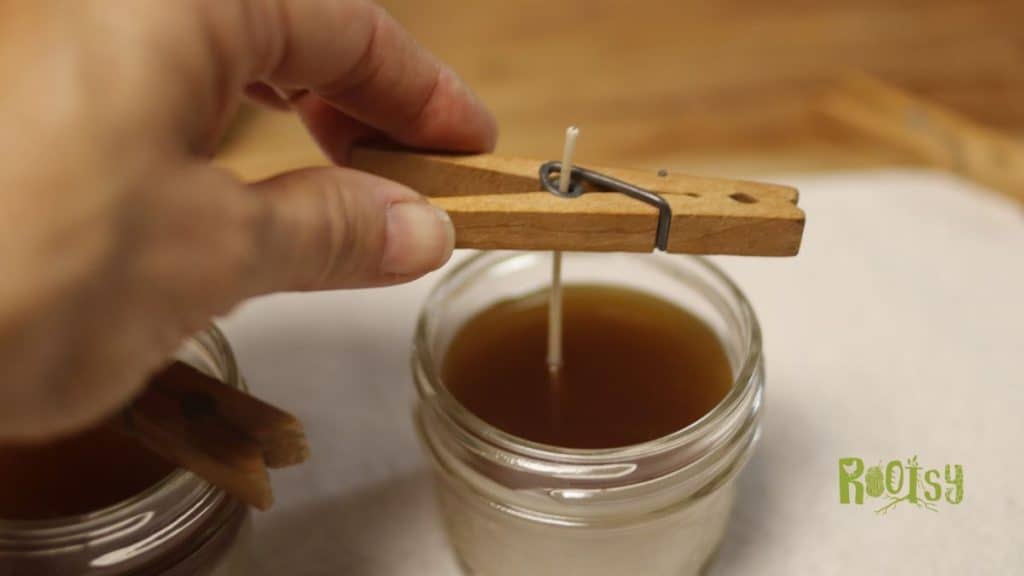
Wick holders – Wicks will tend to move while the wax is still liquid. You want something to hold the wick in the center of the jar. I’ve found that my large clothes pins work just fine, I put the wick through the metal hole (smaller clothespins might not work). You could also drill a small hole into some popsicle sticks or purchase metal wick holder. If the wicks are long enough, you can wrap the top part around a chop stick and lay the chop stick on the top of the jar. Lastly, you can use two chopstick (one on each side of the wick) and a bobby pin (attached to the wick and laying across the chopsticks) as a wick holder.
Thermometer – This is optional but so you know, the ideal pouring temperature for beeswax candles is 155°F-160°F. If the wax is too hot it can cause bubbles and cracking. If it’s too cool it can cause clumping.
Frugal Tip: You can add up to 1/2 cup coconut oil to 1 pound beeswax to make candles. Coconut oil is cheaper than beeswax and it’s still a clean burning oil. It will also help the candles burn more evenly and prevent tunneling.
How to Make Beeswax Candles
Once you have all your supplies ready, it’s time to make the candles. They don’t take long to make but you’ll want to set aside at least an hour so you’re not rushed.
Step 1: Prepare the Jars
Wash and thoroughly dry the jars. Then hot glue a wick in the center of each jar. Set the jars aside with a wick holder to use later.
Step 2: Melt the Wax
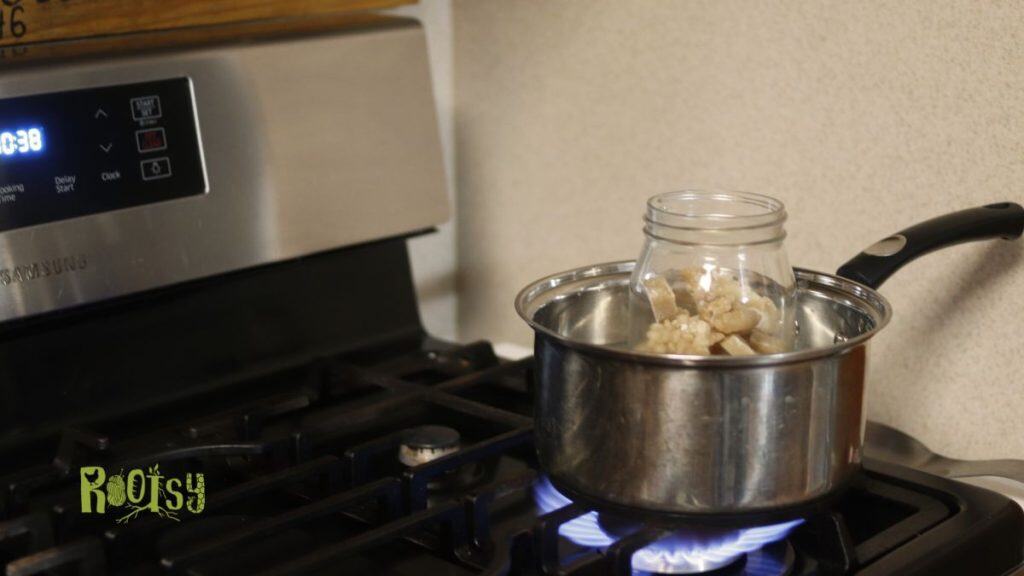
This is the most time consuming part of making beeswax candles. It will probably take 20-30 minutes to melt a pound of wax. Don’t try to rush it but using more heat. A gentle melt is what you want.
Put the pan on the burner and then add the bowl (or mason jar) with the wax to create a double boiler. Turn the heat to medium- high until the wax starts to melt, then turn the heat to medium. Stir occasionally to ensure even heating. You want the wax to stay below 160°F.
Step 3: Pour the Wax
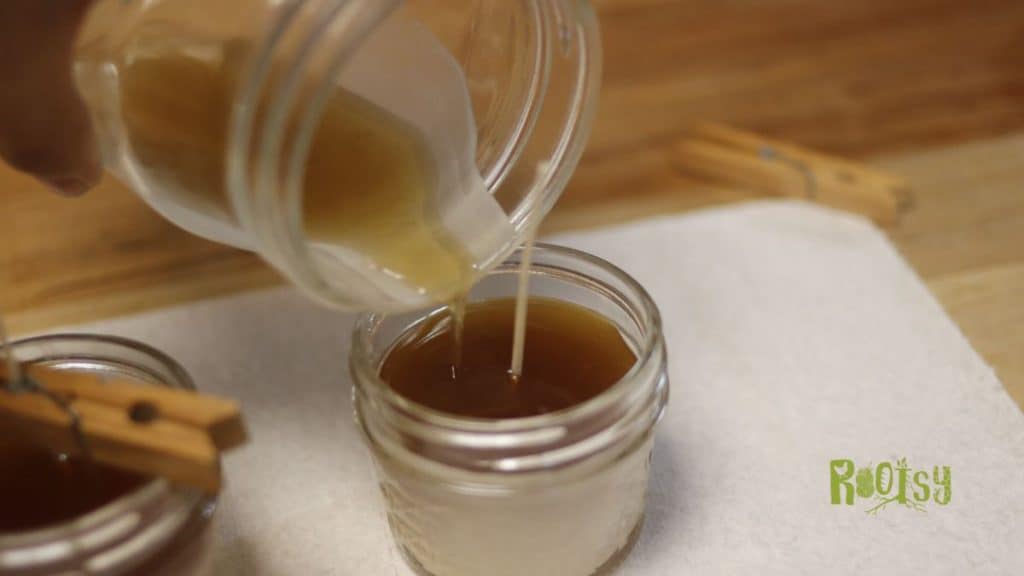
Once all the beeswax is melted, it’s time to pour. Pour the wax into each jar and leave about 1/2-inch space from the top.
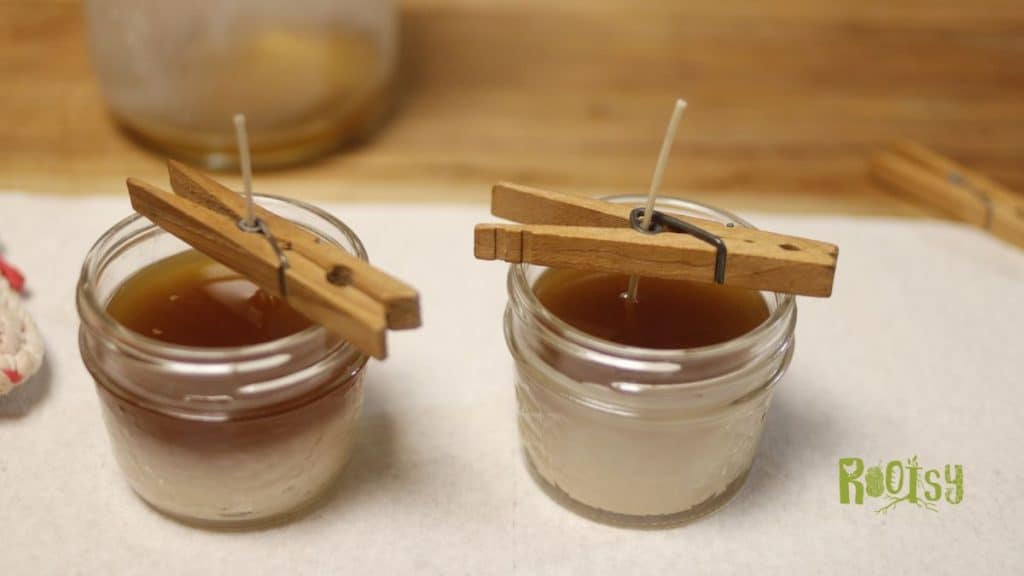
Recenter the wick, if needed, and add the wick holder.
Step 4: Cool and Cure
Let the jars cool completely (4-6 hours) before removing the wick holder and trimming the wick. They need to cure for 24 hours before burning so that they are completely solid (not semi-solid). However, for best long term results, let beeswax cure for 7-10 days.
Pro Tip: If your candle surface cracks as it cools, gently warm the top with a heat gun or hair dryer to smooth it out. Or melt a little more wax and add a thin layer to the top of the candle.

Beeswax candle safety
Each time you burn the candle allow it to remain lit for at least three hours so that a pool of melted wax is established around the wick, that extends to the sides of the candle.
Stop burning the candle when ½ an inch of wax remains at the bottom of the jar. This will ensure that the jar doesn’t get too hot.
The candle wick should self-trim. If the candle wick gets longer than ¼ inch, blow out the candle and trim the wick to 1/8 to 1/4 inch before relighting.
Troubleshooting & FAQs
Why does my candle tunnel?
Candle Tunneling can be caused by a wick that’s too small or because the burn time was too short. Use a larger wick next time you make beeswax candles and make sure to burn the candle for at least an hour the first time it’s lit to help prevent tunnelling.
Can I add essential oils?
Yes, but the essential oil scent will not be very pronounced. Use only 1–2 tsp per pound of wax and add at 140°F or below to preserve scent. If you really want to add essential oils, adding some coconut oil to the beeswax should also help.
Why is my candle cracking?
Either the candle cooled too quickly or the wax was too hot. Use a thermometer and keep the wax under 160°F. If you’re making candles in the winter, pour in a warm room.
How do I clean wax from containers?
Honestly, there’s no magic way to easily clean wax from a container. You can freeze the jar, then try to pop out hardened wax and wash with hot, soapy water. You can also melt the wax by putting a lid on the jar and then putting the jar in hot water. The outer edge of the wax should melt and then you can remove it by turning the jar upside down. Use a paper towel to clean out the remnants of melted wax. This is why I prefer to use dedicated tools for beeswax so I don’t have to worry about cleaning them.
Can I add herbs or flowers to beeswax candles?
Yes. Dried herbs and flowers make nice decorations in candles. Just know that they probably won’t release much, if any, scent. Also, don’t go crazy, just a few lavender buds or rosemary twigs sprinkled on top are perfect.
Storing and Using
Store beeswax candles in a cool, dry place. Make sure to put a lid on them or put put them in a sealed container to keep the dust off them while they’re in storage.
Once lit, be sure to let your beeswax candle burn for at least an hour to ensure even melt.

Beeswax candles for emergency lights
Add beeswax candles to your list of emergency preps. A beeswax candle in a jar is a safe light for power outages and camping. The jar a makes a handy built-in candle holder. And the candle can be extinguished easily without worry of dripping wax and wax burns. Even in small spaces, the candle won’t pollute indoor air quality.
Make some candles for winter power outages and add a few for gifts for friends and neighbors.
Beeswax candles for ambient lighting
Use beeswax candles in place of tapers or tea lights for added safety. Candles in a jar are more stable than taper candles around children and pets. They won’t tip over. They have a long burn time, making them ideal for festive dinners or evenings by the fireplace.

Use candles outdoor on the patio or beside the path
Beeswax jar candles are safe for outdoor use. The jar protects the candle from blowing out in a gust of wind. Use it on the picnic table, when camping, or beside the hot tub under the stars. Add citronella, neem, or lemon myrtle essential oils to ward off biting insects in the summer.
Use handmade candles for an outdoor wedding
For the cowboy boot wearing bride and groom, mason jars are the perfect wedding favor or table centerpiece. Gather your friends and make all you need in an afternoon to celebrate your special day.

Materials
Equipment
Method
- Clean and dry completely.
- Attach the wick to the bottom center with a sticker or dab of hot glue
- Use a wick holder (pencil or chopstick) to keep it centered.
- Add beeswax (and coconut oil, if using) to the double boiler.
- Heat slowly over medium heat until melted (around 145–160°F / 63–70°C).
- Stir occasionally; do not overheat.
- Carefully pour melted wax into prepared jars, leaving about ½" space at the top.
- Re-center the wick if needed. And add wick holder
- Allow to cool completely (4–6 hours).
- Trim wick to ¼ inch.
- Let candles cure at least 24 hours before burning. However, a 7-10 curing is best.
Notes
Use 1 teaspoons for each pound of beeswax for a light fragrance. Too much essential oil will clog the wick of the candle and prevent the uptake of wax to the candle flame, causing the candle to snuff prematurely, so limit your essential oil enthusiasm to the recommended amount.
Made this project?
Leave a comment below!Making your own beeswax candles is a simple, satisfying way to bring light and warmth into your home — and connect more deeply with the natural world. Once you’ve made your first batch, you may never go back to store-bought candles again.
Author Bio:

Chris is a teacher, author, gardener, and herbalist with 30+ years’ of growing herbs and formulating herbal remedies, skin care products, soaps, and candles. She teaches workshops and writes extensively about gardening, crafts, and medicinal herbs on her blog at JoybileeFarm.com. Chris is the author of The Beginner’s Book of Essential Oils, Learning to Use Your First 10 Essential Oils with Confidence and Homegrown Healing, from Seed to Apothecary.
What is the wick diameter that you recommend?
Square braided cotton wicks are best for beeswax candles. For a wide mouth pint size jar use a #6 wick and use smaller wicks for smaller candles.
Can you use cologne or perfume instead of essential oils? Is so, how much?
We’ve never used cologne or perfume in our candles so we can’t speak to the effectiveness or safety of that. Thanks!